The Vertical Hydroponics Tower Explained and How to Build
- Home
- Hydroponic Systems
- Vertical Tower

What Is a Vertical Hydroponics Tower? And How to Build One
Vertical hydroponics towers are becoming popular among hydroponic growers due to the system's efficiency and its ability to fit into small gardening spaces. You can purchase vertical hydroponics tower kits, but they tend to be rather costly. However, you can also build a vertical hydroponics tower yourself if you're good at DIY. In this guide, I'll cover everything you need to know about vertical hydroponics towers, starting from how they work to building one yourself at home. So, without further ado, let's take a look at how vertical hydroponics towers work first and then you will discover how you can build a DIY vertical hydroponics tower.
How Do Vertical Hydroponics Towers Work?
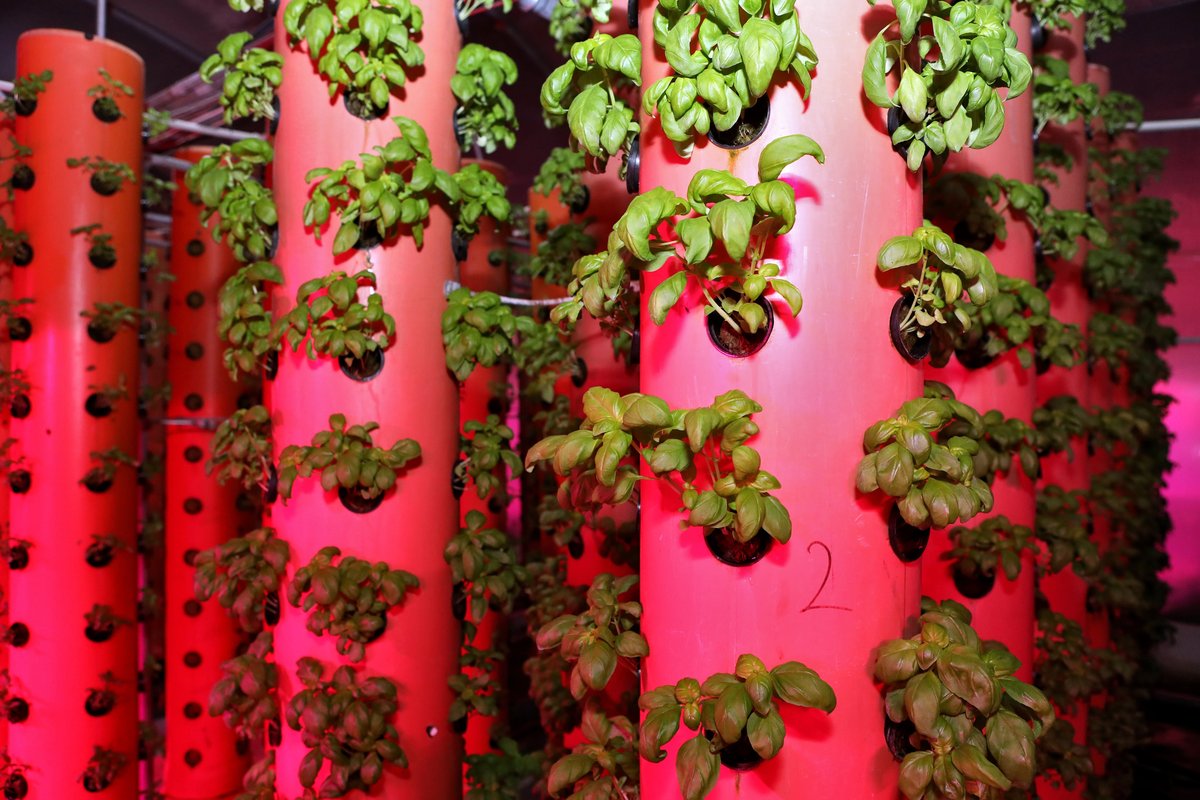
Most vertical hydroponics towers use a tube system with a pump to get water to the top layers. From there, you can channel the water to flow down to the reservoir simply with the help of gravity. In simpler vertical hydroponics towers, a single tube is used to deliver water to the top level; however, there are also more complicated designs with multiple channels to different layers in order to provide optimal delivery of water and nutrients.
Most DIY vertical hydroponics towers use PVC pipes or thicker drainage pipes for the central tower, and then smaller holes are drilled at intervals to house individual plants on these pipes. Plants are typically held in net cups to allow the water to flow through their roots. In most vertical hydroponics towers plants are grown at an angle, usually around 45 degrees. These vertical hydroponics towers are also called "rain towers" because the pump in the reservoir pumps the nutrients to the top of the tower and they rain down on the roots of plants.
Not all vertical hydroponics systems need to use the vertical tower design, though. Some designs use multiple PVC pipes arranged on a trellis frame at diagonal angles. The pipes are usually arranged in a compact zig-zag pattern and plants are housed in net cups, placed in regular 90-degree angles. These systems operate using the nutrient film technique (NFT). The nutrient solution is pumped to the top pipe and from there it flows down in a constant stream, providing a thin nutrient film to plants.
Providing proper lighting to plants in vertical hydroponics towers can be challenging because the plants are placed at an angle, so the best option might be to use vertical grow lights. Grow lights hanging from the ceiling may not be ideal because all the plants are at different heights. The best way to circumvent this is to mount grow lights vertically so that they can cover all the growing surfaces uniformly.
How to Build a DIY Vertical Hydroponics Tower
You will need the following supplies and tools to build a DIY vertical hydroponics tower at home:
Supplies
- 5-gallon (19L) food-grade bucket
- 2 bucket lids
- 7 ft. long 4-inch PVC pipe
- 10 ft. long 1 ½-inch PVC
- 1 pc. 4-inch PVC collar
- 1 pc. 4-inch PVC bracket
- 1 pc. 5-inch PVC square
- PVC solvent cement
- 6 ft. long ½-inch poly tubing
- 1x ½-inch barbed tee
- aquarium-safe silicone
- 2x 1 ½-inch bolts with nuts
- a submersible pump
- 20x 2-inch net cups
- seedlings
- nutrient solution
- hydroton
Tools
- Mitre saw
- Finely bladed jigsaw
- Drill with 3-inch bits
- Tape measure
- Sandpaper
Instructions
The bucket will be used as a reservoir. The PVC pipe will be placed into the tub by making an appropriately sized hole in the lid. You can use pipe of any length depending on the height of the ceiling in your indoor grow area. I would not suggest making a really high tower because it will be less stable, but 5-6 feet (1.5-1.8 m) tall is perfectly safe and easily accessible by most people.
Making the Tower Pillar
- To make the tower pillar, cut two lengths of the 4-inch PVC pipe, one at 6 feet and the other at 4 inches.
- Using your ruler, draw 4 equally spaced lines around your 6 ft. 4-inch PVC pipe. Once you draw your first line, use your tape to measure the remaining three lines at 3 ½ inches apart.
- Use your tape measure to mark where you will drill the holes for your net cups. On the first line, mark the holes 5 inches from the top of the pipe and the rest at 15 inches, 25 inches, 35 inches and, 45 inches marks.
- On the second line, mark the first net cup hole at 10 inches from the top of the pipe and the rest at 20 inches, 30 inches, 40 inches, and 50 inches.
- The net cup holes on the third line should correspond to those on the first line, and those on the fourth line with the ones on the second line.
Making Net Cup Holders
- Use 1 ½-inch PVC pipe to cut 20 net cup holders.
- Cut the cup holder at a 45-degree angle on one end, either a 12-degree angle or straight cut on the other end, and a 1.5 cm space in between. Make 20 of these cup holders.
- Draw a centre mark outside the 45-degree cut side of one net cup holder and centre the cup holder on the hole marks on your 4-inch PVC pipe.
- Align the marks and trace the cup holder's outline on the 4-inch PVC pipe. Repeat this for the remaining net cup holder hole marks. The 45-degree cut points towards the bottom of the pipe.
- To cut out the holes, first drill out holes big enough to accommodate a jigsaw blade then cut along the outline for all 20 hole marks.
- Lightly sand the edges of the holes to smooth them out.
Fitting Cup Holders to the Tower Pillar
- Generously apply PVC solvent to the inner rim of the holes on the 4-inch pipe and the outside of the cup holders.
- Insert the holders into the 4-inch holes and adjust to ensure they fit snugly, leaving no gaps. You can use a piece of wood to push the cup holders, so they stick to the 4-inch pipe.
- Apply more PVC solvent on the outside and let the wood sit for a few minutes then pull it out.
- Once all the holders are glued, apply your aquarium-safe silicone to seal everything in and let it dry for at least 24 hours.
Preparing the Reservoir
- Trace the inside of your 4-inch PVC collar onto the 5-inch PVC square. Next, outline the ½-inch tubing at the centre of the PVC square.
- Cut out the circle from the PVC square and drill a ½-inch hole for the tubing to fit snugly.
- Randomly drill around 20 1/8-inch holes on the cover and lightly sand afterward.
- Drill two holes on your 5-gallon bucket and secure your PVC bracket with two sets of bolts and nuts. Leave some allowance at the top so the bucket can close.
- With the 4-inch PVC pipe in the bucket secured by the bracket, measure the distance between it and the bucket's inner rim.
- Place the 4-inch pipe on one lid; trace the outline and cut out the 4-inch circle using your jigsaw.
- Cut the edges of the second lid off so it fits snugly inside the bucket. Retrace the 4-inch pipe outline. Remove the lid.
- Using a jigsaw, cut out the 4-inch circle. This will help keep the pipe securely in place when inside the bucket to prevent tipping.
Assembling Your Vertical Hydroponics Tower
- Glue your 4-inch PVC collar onto the top of the 4-inch PVC pipe.
- With the 4-inch PVC in the bucket, place your pump into the reservoir and mark where the tubing will exit. Cut out the hole and drill several other holes at the bottom of the 4-inch PVC.
- Put your poly tubing through the ½-inch hole on your PVC cover and insert the ½-inch barbed tee into the hose tubing.
- Insert the PVC cover into the 4-inch collar.
- Cut a notch on the bucket rim for the electrical cord and the air hose tubing.
- Place your tower through the first lid, the bracket, and onto the second lid at the bottom of the bucket. Next, connect the tubing to your pump.
- Fill the reservoir with water and do a test run to check for leaks. If you need to reapply the silicone, let it dry for another 24 hours.
- Leave running overnight to ensure everything is perfect.
- Congratulations, your vertical hydroponics tower is ready! You can now fill the reservoir with nutrient solution. Next, place your seedlings in the 2-inch net cups and add hydroton to block out the light and keep the seedlings in place. You can make a cut on the net cups to make it easier to seat their outer rim on the holder's rim. Make sure the net cups sit firmly in the pipe. That's it, you can now start your system and start growing delicious, fresh produce.
One email a month from me, Charlie. What is new on the site, one grower’s question answered properly, and the latest video. No spam, no selling.


I’m Charlie, co-founder of Everything Hydroponics. I’ve completed an official qualification in hydroponic cultivation, I run the Everything Hydroponics YouTube channel, and I’ve advised and taught many new and existing growers. I’m a teacher at heart, so what you read here is backed up by peer reviewed research and presented in a digestible way. Most of my growing time now goes on chillies. More about Charlie
You might like these
Deep Water Culture: Build A DWC System From A Storage Box
Deep water culture suspends roots in aerated nutrient solution. It needs very few parts, and this is how to build one and why it suits a first system.
Ebb And Flow Hydroponics: How Flood And Drain Systems Work
Ebb and flow floods the roots then drains them, because not every plant likes sitting in water. How the system works, and how to build one.
Wick System Hydroponics: The Simplest System To Build
A wick system draws solution up into the medium with no pump and nothing to fail. What it suits, what it cannot keep up with, and how to build one.