Hydroponic Wick System
- Home
- Hydroponic Systems
- Wick System
Hydroponic wick systems are often regarded as one of the simplest forms of hydroponics, making them an excellent entry point for beginners. Because this method requires no pumps, aerators, or electricity, almost anyone can set it up with minimal effort. It is particularly useful in locations where power is unavailable or unreliable.
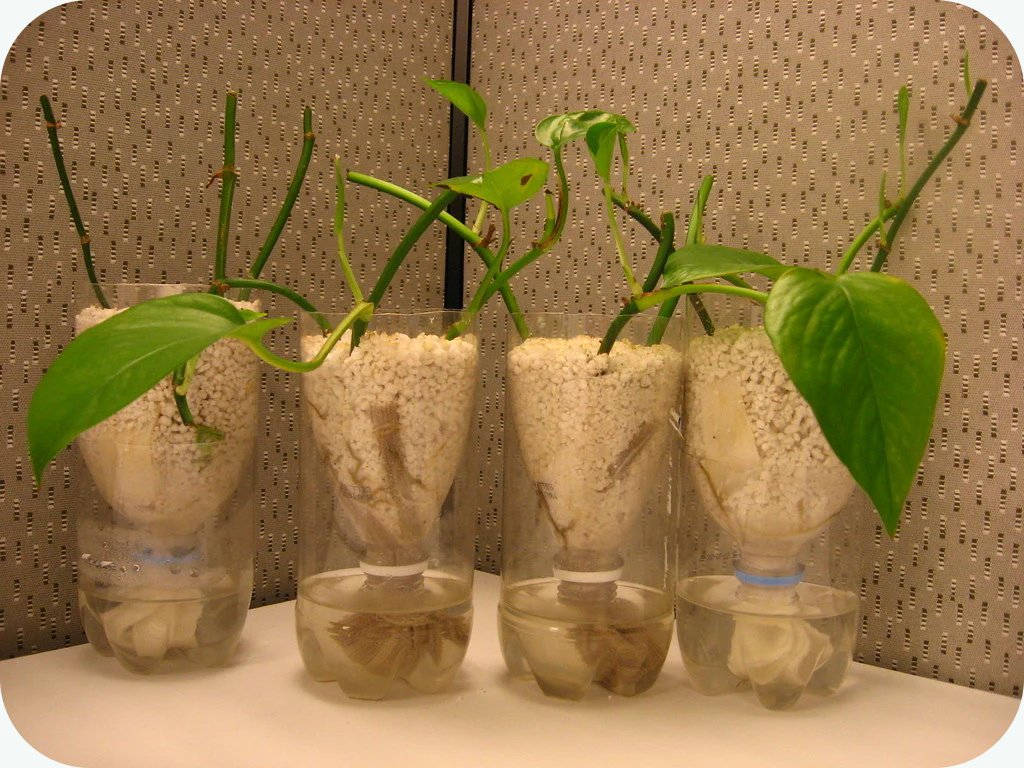
In a wick system, plants are placed in a porous growing medium, commonly perlite, vermiculite, or coco coir, and absorb nutrients through one or more wicks that extend from the medium into a reservoir of nutrient solution. The wicks, usually made from materials such as cotton rope, nylon, felt, or string, draw the solution upward by capillary action, gradually delivering moisture and nutrients to the plant’s roots. Since there are no moving parts, the system is considered a type of passive hydroponics.
How a Hydroponic Wick System Works
The wick draws nutrient solution from the reservoir and transfers it into the growing medium, where it becomes available to the roots. Because the medium must allow water to move through it easily, porous materials like coco coir, vermiculite, and perlite are ideal; they retain enough moisture to keep the roots hydrated without becoming waterlogged. One advantage of this setup is that the plants regulate their nutrient intake naturally. When the plant requires more water or nutrients, it simply absorbs more from the wick.
Wick systems are inexpensive, require little maintenance, and take up very little space. Once installed, they run themselves with minimal intervention, making them especially appealing to newcomers.
However, this simplicity also creates limitations. Wicks cannot transport large volumes of nutrients quickly, so the system is best suited to small plants and herbs. Heavy feeders, such as tomatoes and peppers, need more nutrients and water than the wick can supply, making them poor candidates for this method. Root crops also struggle, as the consistently moist environment can encourage rot.
Nutrient distribution can be uneven, and mineral salts may accumulate over time. To prevent build-up, it is wise to flush the system with fresh water every two weeks. Although aeration is not required, some growers choose to add an air stone and pump for additional oxygenation.
Wick systems are ideal for leafy greens and herbs, including:
- Lettuce
- Basil
- Oregano
- Thyme
- Rosemary
- Mint
- Chicory
- Comfrey
These plants have modest nutrient needs and thrive in the moist environment the system provides.
Crops not recommended for wick systems include:
- Tomatoes and peppers (too nutrient-hungry)
- Root vegetables (risk of rot in damp media)
Improper wick placement can also cause issues; if the wicks are too far from the roots or become dry or clogged, plants may fail to receive enough nutrients and can die.
Video Guide for Understanding and Building Wick Systems
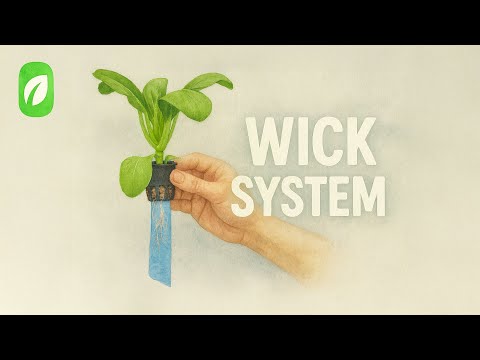
How to Build a Hydroponic Wick System
What You’ll Need
-
Reservoir: A container to hold the nutrient solution.
-
Growing bucket: Ideally opaque or dark-coloured to minimise light and prevent algae growth.
-
Growing medium: Coco coir, perlite, and vermiculite work best. You may also use hydroton pebbles as a top layer.
-
Nutrient solution: Stored in the reservoir.
-
Wick material: Cotton rope, felt strips, old clothing, mop strands, or similar absorbent material. You’ll need 2-3 feet per wick, about 1 inch thick.
-
¾-inch drill bit and electric drill: For creating a hole for the wick.
-
Optional air pump and air stones: Improve oxygenation and prevent nutrients from settling, but not strictly required.
-
Digital EC and pH meters: For monitoring nutrient strength and acidity.
The wick draws nutrient-rich water from the reservoir directly into the growing medium. When the plant requires water or nutrients, it absorbs them from the moistened medium. This passive movement of the solution means the wick must remain fully submerged. If it is left hanging above the water line, the system will fail.
Suitable starter plants include lettuce, leafy greens, and herbs, which have modest nutrient demands and thrive in this low-maintenance setup.
Tips for Best Performance
-
Pre-wash the wick before using it; this improves capillary action.
-
Most systems need 2-4 wicks, depending on the size of the bucket and the distance between the wick and the roots. A shorter distance increases efficiency.
-
Ensure the reservoir remains topped up so the wicks stay immersed.
-
While not required, adding an air pump increases oxygen levels and helps keep nutrients from settling at the bottom of the reservoir.
The growing medium should retain moisture without oversaturation. Perlite, vermiculite, and coco coir all work well. If your wick draws liquid too quickly, adding larger media such as hydroton pellets can prevent overwatering.Step-by-Step InstructionsAdditional Notes
-
Prepare the bucket
Use a 3-gallon bucket and drill a ¾-inch hole in the centre of the base. This bucket will hold your plant.
-
Fill the reservoir
Fill it with nutrient solution so that the bucket will sit just above the liquid level. Keep a jug of the same solution aside for later.
-
Insert the wick
Feed the wick through the hole so it hangs into the reservoir. Aim for roughly 1 foot inside the growing bucket and 2 feet in the reservoir. Suitable materials include nylon rope, wool rope, polypropylene strips, mop strands, or recycled fabric.
-
Add growing medium
Fill the bucket two-thirds full with your chosen medium.
-
Position the plant
Place the plant in the bucket, ensuring the wick sits close to the roots so it can deliver moisture efficiently.
-
Top off the medium
Fill the remaining third of the bucket with more growing medium or hydroton pellets.
-
Assemble the system
Set the growing bucket in position above the reservoir.
-
Water in the plant
Pour the reserved nutrient solution around the plant to prevent the medium from wicking moisture away from the roots prematurely.
-
Optional aeration
If using an air pump or stones, run the airline into the reservoir. Black tubing is preferable to prevent algae growth.
-
Larger buckets require additional wicks to ensure consistent moisture delivery.
-
After harvesting, rinse the growing medium to remove accumulated salts.
-
Monitor the nutrient strength and pH using digital meters when possible.
-
Once you become familiar with wick systems, you may wish to try more advanced hydroponic methods to grow a wider variety of crops.
Wick hydroponics encourages creativity and reuse. Common household containers (glass jars, plastic bottles, tubs, or buckets) can all be repurposed into functional systems.
One email a month from me, Charlie. What is new on the site, one grower’s question answered properly, and the latest video. No spam, no selling.


I’m Charlie, co-founder of Everything Hydroponics. I’ve completed an official qualification in hydroponic cultivation, I run the Everything Hydroponics YouTube channel, and I’ve advised and taught many new and existing growers. I’m a teacher at heart, so what you read here is backed up by peer reviewed research and presented in a digestible way. Most of my growing time now goes on chillies. More about Charlie
You might like these
Deep Water Culture: Build A DWC System From A Storage Box
Deep water culture suspends roots in aerated nutrient solution. It needs very few parts, and this is how to build one and why it suits a first system.
Ebb And Flow Hydroponics: How Flood And Drain Systems Work
Ebb and flow floods the roots then drains them, because not every plant likes sitting in water. How the system works, and how to build one.
Nutrient Film Technique: How NFT Systems Actually Work
NFT runs a thin film of nutrient solution down sloped channels past bare roots. How it works, what flow rate to use, and why the pump is the weak point.